Sunday, May 31, 2009

Working With Real Wood

Most of yesterday was spent working on Whitecap and getting her ready for launch on June 21st. The weekend schedule is such that launch date is earlier than it would seem and opportunities to spruce her up are few and far between. We got one coat of finish on all the bright work and the all important swim platform. This year the bottom only needs some touch up and we have one side done on that job. Just one more coat of finish on the bright work and the rest of the bottom paint, some serious clean up and she'll be ready to go.

Today was pram day. I had made some templates (again with the help of an old Susan Collins poster) for the bow and stern quarter knees during the past week by taking the measurements off the plans and getting the angles off the boat. We settled on a shape we liked and cut them out. Since the quarter knees were going to be made of mahogany, John wisely thought we should cut a trial model out of a piece of junk wood just to make sure we had all the angles right. That was good because we didn't.

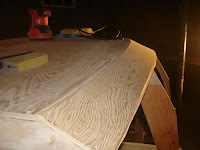
We messed around with it for a while and finally got something that worked for the stern. Next we cut the stern knees out of the mahogany. The bow knees are larger and the angles a little different but we managed to get something that worked there too. After John cut the angles on the straight cuts with the table saw, I cut the curves out with the jig saw and then sanded the corners nice and smooth. Below you see the finished product. This week, I will put a couple barrier coats of epoxy on the knees and they will be ready for installation next weekend. I also hope to get two barrier coats of epoxy on the outside of the hull this week.

After that installation we will tackle the guard rails along the sides of the boat.

Saturday, May 23, 2009

Breaking the Mould

Today was a big day. John removed all the strategic screws from the pram and when son Ben came over late this afternoon, we lifted her off the building jig and turned her over. In this view of her bow, you can see her laminated fore keel, bow transom, garboard, middle and shear planks. There are also quite a few epoxy rundowns that I am going to have to figure out how to remove before painting.


Below you can see the laminated midships frame and the stern transom with the bottom and planks attached. We have elected to keep the cross piece attached to the midships frame thinking it will add some strength to the midships section when we are bending the oak rub rail onto her. We have read one blog which suggests that there is a little tendency for the pram to reshape under the pressure of the oak rails. He even went so far as to create his own steaming system so he could bend the oak to fit the boat. We don't think this is going to happen, but the cross piece will help to make sure it doesn't.


Wednesday, May 20, 2009

It's A Boat!

Last night John and I installed the last plank onto the boat. It is now officially a boat!


I resisted the urge to take the temporary screws out this morning because the bevel on the plank above the shear strake is small in surface area and we didn't have a whole lot for the shear strake to glue to so I wanted to give the epoxy all the time it needed to cure today. I did do some more of the tedious work of filling the screw holes and faring some of the places that needed it. I have some slow hardener for the epoxy and some filler to put in it for this purpose. I am still experimenting with the perfect thickness for the epoxy but today was better than the last attempt so by the time I have the boat all filled and fared, I ought to know what the optimum thickness is. The slow hardener gives me more time to work before the epoxy sets up. The slow hardener also gives the epoxy time to sink into the wood and harden it.


The pictures may not be pretty to the casual observer, but they are beautiful to me!

Saturday, May 16, 2009

One Plank Short of a Boat

Last week, I spent a considerable amount of time planing the lap of the first middle plank we put on the pram down so it was about 1/8" to 3/8" deep. This took a lot of time and was extremely difficult to do without making dents in the garboard plank above it. I finally got it so I liked it but not without some need for filling and faring on the garboard. So when it came to the next planks to be added, the other middle plank and the shear strake, I decided I would be smarter and plane the planks down more before they were fastened to the boat. This worked pretty well. I did my bevels and finally we had a chance to do the installation today. We have the process down to a science by now and we drilled the screw holes and counter sunk both planks before we mixed the epoxy and put them on one right after the other. Even finding the screw holes isn't a big problem now. So, below, you see the stern view.....

And the view from the bow.....


We will put the other shear strake on this week some evening after I get it fitted. Then I will fill all the screw holes with epoxy filler and we can break her free of the moulds and turn her over.

We have decided to work on getting her ready for rowing this summer and not worry about the sailing part until next winter. We will put the sailing parts that we absolutely have to now, but she probably won't sail until 2010.

Saturday, May 9, 2009

Planking

This afternoon, we installed two more planks. We are now half finished with the planking. We started with the other garboard plank. This one fit on like a dream. We got all the screw holes drilled. This included the temporary ones for the sheetrock screws. We counter sunk the ones that needed to be counter sunk and took the plank off for cleaning before the bonding. I mixed up a batch of epoxy and spread it on all the mating surfaces and we placed the plank back on the frames. We had a little trouble finding the first screw hole, but after we located one, the others fell right into place. We had the thing screwed on in no time. Below, you see the finished product.

We decided to go for two since I had all the bevelling done for the middle plank on the other side of the boat. We went through the same process as before and had the second one installed in about an hour. There will be a lap of about 1/8" between the garboard plank and the middle plank. I will plane down the edges of the middle plank and fill the valley between the two planks with epoxy with filler in it. There won't be any water getting between those two planks.

Below you see us almost looking like a boat.

Thursday, May 7, 2009

Attaching the First Garboard Plank

I have been putting a bevel on the bottom piece of the pram in my spare time this week, so I convinced John we could attach the first garboard plank in no time last night. So we did. It wasn't exactly no time, but we got the plank positioned and the screw holes drilled in good order. The plank is held to the bottom by screws in the stern transom, the midships frame, the fore keel and the bow transom. All of the rest of the surfaces are held together with epoxy. In order for the epoxy to form a tight bond, we had to put temporary sheetrock screws in the beveled edges at intervals along the edge of the garboard and into the bottom. The holes made by the temporary sheetrock screws will be filled with epoxy once we are done with them. Below you see our beveled edge ready for the plank.


After we had all the screw holes made, we removed the plank and cleaned everything up. I mixed up a batch of epoxy and we spread it on the mating surfaces on both the boat and the plank. We have put masking tape where we don't want epoxy to be. The directions say to put waxed paper on the temporary mould surfaces where you don't want the planks to stick. We used a small nail again to find our screw holes when we put the plank back on the boat and set screws in spots that would hold the plank while we drove the rest of the screws. We used small pieces of shim wood to keep the heads of the sheetrock screws from sinking into the plywood plank. Below you see the plank all screwed down and the clamps holding it to make sure. We had some problems with the holes we drilled in the bow transom and ended up splitting a small piece of the transom off and having to drill another hole. This will have to be repaired with epoxy and filler when we plug the screw holes.


Tonight I spent some time planing off the overlap and sanding it so it is fare with the bottom. It looks pretty nice. I'm ready to do the second garboard on this weekend!


Saturday, May 2, 2009

Fastening on the Bottom

Today we fastened on the bottom of the boat. We spent quite a lot of time getting everything lined up the way we wanted it. In spite of what we thought were careful measurements and leveling and squaring, we still had some things that just were not right. I guess that was where we had to start flying by the seat of our pants.


We began with the bow and midships frame. We clamped the pointie part of the bow where we wanted it and then fit the bottom onto the #3 mould and the midships frame by lining up our center line with each of the frames and clamping it to the midships frame. We reinforced the bow clamp by clamping onto an oak board placed across the bottom piece just aft of the #3 mould and the building jig. This held everything securely enough so that we could drill the holes in the fore keel and the midships frame for the screws.


After drilling the holes, we took the bottom off and cleaned everything up ready for the epoxy. I spread epoxy on both mating surfaces of the bottom and the frame and fore keel. We placed the bottom back on our carefully marked way points and used a small nail to find the screw holes.
The silicon bronze screws are soft and you have to be careful when you screw them in. We buggered some of them trying to use the power drill so most of the screw driving had to be done by hand.


After we had driven all the screws in the fore keel and midships frame, we moved to the stern transom. We brought our two bar clamps and oak board from the bow and placed it across the stern. We clamped the two bar clamps onto the board and the 2 x 4 on the building jig and were able to get the stern of the bottom snug against the stern transom so we could drill the screw holes and countersink them. Then we loosened the clamps so we could epoxy the two mating surfaces. We then tightened the clamps again and tightened the screws. This fastened all the pieces up tight as a teddy bear.


We were both anxious to see how the garboard planks would fit onto the bottom, but we had too many clamps fixed onto the bottom and thought we had better wait until the epoxy set before we removed them and began to fit the garboards.