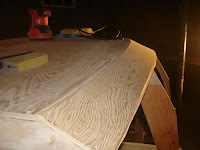
I have been putting a bevel on the bottom piece of the pram in my spare time this week, so I convinced John we could attach the first garboard plank in no time last night. So we did. It wasn't exactly no time, but we got the plank positioned and the screw holes drilled in good order. The plank is held to the bottom by screws in the stern transom, the midships frame, the fore keel and the bow transom. All of the rest of the surfaces are held together with epoxy. In order for the epoxy to form a tight bond, we had to put temporary sheetrock screws in the beveled edges at intervals along the edge of the garboard and into the bottom. The holes made by the temporary sheetrock screws will be filled with epoxy once we are done with them. Below you see our beveled edge ready for the plank.

After we had all the screw holes made, we removed the plank and cleaned everything up. I mixed up a batch of epoxy and we spread it on the mating surfaces on both the boat and the plank. We have put masking tape where we don't want epoxy to be. The directions say to put waxed paper on the temporary mould surfaces where you don't want the planks to stick. We used a small nail again to find our screw holes when we put the plank back on the boat and set screws in spots that would hold the plank while we drove the rest of the screws. We used small pieces of shim wood to keep the heads of the sheetrock screws from sinking into the plywood plank. Below you see the plank all screwed down and the clamps holding it to make sure. We had some problems with the holes we drilled in the bow transom and ended up splitting a small piece of the transom off and having to drill another hole. This will have to be repaired with epoxy and filler when we plug the screw holes.

Tonight I spent some time planing off the overlap and sanding it so it is fare with the bottom. It looks pretty nice. I'm ready to do the second garboard on this weekend!


No comments:
Post a Comment