Saturday, October 3, 2009

Installing the Oarlocks

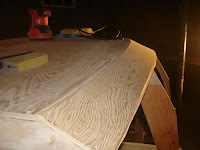
This afternoon we carried the pram back to the cellar so we could put the truck back in it's side of the garage. I have put three coats of paint on the inside and outside of the hull. We can work on finishing it up in the cellar. Since it was raining, John decided to install the oarlocks this afternoon. He ran into a little problem while drilling the very last hole in the last holder. He ran into one of the screws we used to fasten the gunwale rail onto the side of the boat. He managed to work out of the problem without need for any touch up work at all. Below, you see the two rowing stations and the seats lying in their places. They will not be fastened down until the keel has been installed on the bottom.


Last weekend, John cut out the keel piece and the rudder. I have been sanding and shaping the keel this week. I will put several coats of varnish on it before we install it on the bottom of the boat. We want to install the gunwale guard before we fasten on the keel because the boat will lie flat on the ladder frame now and it won't after the keel is installed.


Saturday, September 12, 2009

First Outside Coat

This afternoon, I put the first coat of cream paint on the outside bottom. We decided we could mark a new center line on the bottom for the installation of the keel after the paint had dried. I was free to paint my three coats of cream. This is what the first one looked like.

Monday, September 7, 2009

Laying out the Keel

It being Labor Day, we decided to do some labor. We have been planning out how we would shape the keel for several weeks. We didn't want to experiment with the piece of mahogany we had for the finished keel, so we took a piece of left over 1/4" plywood for the shaping job.

We laid it along the bottom center line of the pram and using a block of wood with a felt tipped pen taped to it, we drew the curved bottom line on the piece of plywood.

Then we cut that line out with our saber saw.

We shaped the resulting curved cut so it fit along the bottom of the boat nicely. Next we clamped the pattern onto the piece of mahogany and made sure we had enough board to make the necessary depth for the keel. We drew our curved line on the mahogany and marked the points at which it had to be certain depths.

After removing our pattern, we used a compass to draw the curved aft end of the keel and then used one of our battens to draw the fared shape of the keel.

Now the keel is ready to cut out on a friend's band saw. Since we will have the use of the band saw, we decided to mark the shape of the rudder and cut that out also.

This may seem like an overly detailed explanation of the process, but if you (like us) are not an experienced boat builder it takes a little doing to figure out a way to accomplish the job. We also have not been able to find any guidance on the web or in the book. So, here is how we did it.

Wednesday, September 2, 2009

Some Progress

Just because there have been no recent posts doesn't mean there has been no progress on the pram. The three seats have received three coats of varnish and are ready to install. See below.

The inside has received three coats of cream colored paint. The knees have been varnished, but still need one more coat before they can be called "done". The going has been slow because painting has been a challenge this summer. Not only is time a problem, but the weather has been wet and the air has been damp. Not good drying conditions.

Last night I did the first coat of red on the shear strakes. I can't paint the whole bottom because we need the center line on the bottom to score the curved bottom line onto the piece of mahogany we have for the keel. Once we have that done, I can finish up the painting. Launching this year is beginning to look doubtful.

Monday, July 27, 2009

Painting the Inside

Yesterday, the pram came out of the cellar and into the garage where she will be painted. I fine sanded her all over and cleaned up all the dust until I could run my hand over the planks and only feel wood, no grit or dust. Tonight, I taped the knees which will be varnished and rolled on the first coat of cream colored paint. This is the first time I have ever rolled paint on a boat. It does a nice job. I tipped out the streaks made by the roller with a brush. I also used the brush to get the places the roller didn't.


The end product looks nice. I used Epifanes marine enamel. I will do three coats in the end. I plan to sand the first coat with 220 grit sandpaper and then not sand between the second and third coats.

Sunday, July 19, 2009

Fitting The Seats

Yesterday wasn't a boating day, at least on the water boating. Since it was raining, again, we took the time to work on fitting the seats into the pram. John had brought some pieces of mahogany up from the mill to use for seats. We trimmed the edges first. Next we calculated the angle that each end would have to be cut to. Then the bow to stern angle. The picture below shows one end of the stern seat already cut and John marking the other end.

Here is the stern seat after cutting and placing.

We went on and used the same process for all three seats. The middle seat had to be fitted around the midships frame. The plans call for the middle seat to be removable to give the sailor more room to work while under sail. We will eventually take our middle seat out, plug the screw holes and make it removable. One thing I should add is that in the plans, it calls for the seat supports to be 1" on the support surface. In the hand drawn sheet which shows how to make the removable middle seat, it calls for two inch support surfaces. We found the size screws called for in the plans to fasten the seats would be way too big to fasten to the 1" supports. However, they probably would work with 2" supports.

Now we will sand out the seat surfaces and round over the edges before putting three coats of varnish on. After one more coat of epoxy and a lot of 220 grit sandpaper, we will finally be ready to paint the inside of the pram. Then we will fasten the seats into the boat.

Monday, July 13, 2009

Seat Supports

The next project on the pram was to create the seat supports. These are nothing more than blocks of wood about 8" long, fastened to the sides of the boat. The seats are laid on top of and screwed to these supports. We are using scrap pieces of mahogany for the supports. Our seats will be 1" by 8" mahogany. The seats are fashioned so that they may be removed for refinishing as needed over the life of the boat. We will varnish the mahogany seats and install them after the boat has been painted. We plan to just paint the supports and not fuss with varnish. Below, John is measuring the lengths before he cuts the small pieces to fit. After they are cut to length, we will have to sand and shape them to fall flat on the curved sides of the boat.

Last night, we went down to install the supports. We drew lines on the side of the boat to mark the proper positioning of each support and did final sanding to make them fit snug against the side of the boat. We carefully marked on each support where it's home would be (port stern, port middle etc.). Then we drilled the holes through the sides of the boat from the inside out using our positioning marks as guides. Below you see John countersinking each hole from the outside of the boat plank.

At this point, we discovered that we didn't have any of the proper sized screws left to fasten the supports to the side of the boat. Next we looked at the fasteners called for in the plans to secure the seats to the blocks and discovered they were way too big to do the job. So it was off to the computer to order another box of 1" #8 bronze flat head wood screws and some more appropriately sized screws for the seats.

Monday, June 29, 2009

Rubrails Part II

Tonight we screwed the second rubrail on the side of the pram. This one went on a little easier, but it didn't twist quite as nicely as the first one did. We had to put an extra screw in the very last position at the bow transom to hold it tight against the shear strake.


This morning, I took the clamps off the first rub rail sanded everything smooth. Now we will do the seats. I think I mentioned in an earlier post that we are puting off making the sailing parts until next winter in the interest of getting her in the water this summer.

Sunday, June 28, 2009

Knees and Rails

This weekend we made some real progress on the pram. We had installed the stern corner knees during the week and on Sunday we worked on the bow knees. As you can see below, we got those all done before we broke for lunch.


Next we began drilling the screw holes for the oak rub rails. That involved drilling holes from the outside into the knees on each end and from the inside out into the rails for the sides of the boat. Then we countersunk all the screw holes. Below, John is drilling near the bow knees.


Next, I mixed up a batch of epoxy and spread it onto both mating surfaces. We worked along the side of the boat clamping and putting in screws until we had them all fastened in tight. Then we cut off the remaining lengths of rail at each rail and I sanded them smooth. Below, you see our sea of clamps holding the whole project together until the epoxy hardens.

Saturday, June 20, 2009

Slow Progress

The past several weeks most of our free time has been devoted to getting boats ready to go in the water and mowing the lawn. I have had some time to work on the inside of the pram and have managed to smooth all the places that needed smoothing and get one barrier coat of epoxy on the inside. We cut the sculling groove in the stern transom and drilled the hole in the bow transom through which the bow painter will be threaded. I have put one coat of varnish on the knees and will fine sand it for another one as soon as time allows. We have ripped the rub rails out of a piece of oak and bent them around the side of the boat to see how they are going to fit. They have been set aside to await installation.

Launch date for Whitecap is on Sunday June 21st so at least that part will be done and we can devote a little time to the pram. If it doesn't stop raining, we will have plenty of time to work on her.

Tuesday, June 2, 2009

Barrier Coating

Yesterday I did some more hole filling and smoothing on the outside of the pram. Today I was able to sand all that smooth. I also cleaned up a lot of sawdust from the cellar floor. I decided to paint one barrier coat on the mahogany knees so they could be soaking in and drying. I did that and they looked mighty pretty when I got done.

Then tonight I rolled a barrier coat of epoxy onto the outside of the pram. This process really worked better than I expected it to. I was able to get a thin enough coat with the roller so it went on smoothly and I didn't have the problem with drips that I have had while putting the stuff on with a brush. I will do another coat when that one is about as tacky as masking tape, probably tomorrow night. She looks like a honey nut now. After I get two or perhaps three barrier coats of epoxy on, I will go over the outside with 220 grit sandpaper to smooth things up and she will be ready for three coats of paint. I have read an article on painting wooden boats (in Wooden Boat magazine I think) and I think I will try the process outlined in the article. More on that later.

Sunday, May 31, 2009

Working With Real Wood

Most of yesterday was spent working on Whitecap and getting her ready for launch on June 21st. The weekend schedule is such that launch date is earlier than it would seem and opportunities to spruce her up are few and far between. We got one coat of finish on all the bright work and the all important swim platform. This year the bottom only needs some touch up and we have one side done on that job. Just one more coat of finish on the bright work and the rest of the bottom paint, some serious clean up and she'll be ready to go.

Today was pram day. I had made some templates (again with the help of an old Susan Collins poster) for the bow and stern quarter knees during the past week by taking the measurements off the plans and getting the angles off the boat. We settled on a shape we liked and cut them out. Since the quarter knees were going to be made of mahogany, John wisely thought we should cut a trial model out of a piece of junk wood just to make sure we had all the angles right. That was good because we didn't.

We messed around with it for a while and finally got something that worked for the stern. Next we cut the stern knees out of the mahogany. The bow knees are larger and the angles a little different but we managed to get something that worked there too. After John cut the angles on the straight cuts with the table saw, I cut the curves out with the jig saw and then sanded the corners nice and smooth. Below you see the finished product. This week, I will put a couple barrier coats of epoxy on the knees and they will be ready for installation next weekend. I also hope to get two barrier coats of epoxy on the outside of the hull this week.

After that installation we will tackle the guard rails along the sides of the boat.

Saturday, May 23, 2009

Breaking the Mould

Today was a big day. John removed all the strategic screws from the pram and when son Ben came over late this afternoon, we lifted her off the building jig and turned her over. In this view of her bow, you can see her laminated fore keel, bow transom, garboard, middle and shear planks. There are also quite a few epoxy rundowns that I am going to have to figure out how to remove before painting.


Below you can see the laminated midships frame and the stern transom with the bottom and planks attached. We have elected to keep the cross piece attached to the midships frame thinking it will add some strength to the midships section when we are bending the oak rub rail onto her. We have read one blog which suggests that there is a little tendency for the pram to reshape under the pressure of the oak rails. He even went so far as to create his own steaming system so he could bend the oak to fit the boat. We don't think this is going to happen, but the cross piece will help to make sure it doesn't.


Wednesday, May 20, 2009

It's A Boat!

Last night John and I installed the last plank onto the boat. It is now officially a boat!


I resisted the urge to take the temporary screws out this morning because the bevel on the plank above the shear strake is small in surface area and we didn't have a whole lot for the shear strake to glue to so I wanted to give the epoxy all the time it needed to cure today. I did do some more of the tedious work of filling the screw holes and faring some of the places that needed it. I have some slow hardener for the epoxy and some filler to put in it for this purpose. I am still experimenting with the perfect thickness for the epoxy but today was better than the last attempt so by the time I have the boat all filled and fared, I ought to know what the optimum thickness is. The slow hardener gives me more time to work before the epoxy sets up. The slow hardener also gives the epoxy time to sink into the wood and harden it.


The pictures may not be pretty to the casual observer, but they are beautiful to me!

Saturday, May 16, 2009

One Plank Short of a Boat

Last week, I spent a considerable amount of time planing the lap of the first middle plank we put on the pram down so it was about 1/8" to 3/8" deep. This took a lot of time and was extremely difficult to do without making dents in the garboard plank above it. I finally got it so I liked it but not without some need for filling and faring on the garboard. So when it came to the next planks to be added, the other middle plank and the shear strake, I decided I would be smarter and plane the planks down more before they were fastened to the boat. This worked pretty well. I did my bevels and finally we had a chance to do the installation today. We have the process down to a science by now and we drilled the screw holes and counter sunk both planks before we mixed the epoxy and put them on one right after the other. Even finding the screw holes isn't a big problem now. So, below, you see the stern view.....

And the view from the bow.....


We will put the other shear strake on this week some evening after I get it fitted. Then I will fill all the screw holes with epoxy filler and we can break her free of the moulds and turn her over.

We have decided to work on getting her ready for rowing this summer and not worry about the sailing part until next winter. We will put the sailing parts that we absolutely have to now, but she probably won't sail until 2010.

Saturday, May 9, 2009

Planking

This afternoon, we installed two more planks. We are now half finished with the planking. We started with the other garboard plank. This one fit on like a dream. We got all the screw holes drilled. This included the temporary ones for the sheetrock screws. We counter sunk the ones that needed to be counter sunk and took the plank off for cleaning before the bonding. I mixed up a batch of epoxy and spread it on all the mating surfaces and we placed the plank back on the frames. We had a little trouble finding the first screw hole, but after we located one, the others fell right into place. We had the thing screwed on in no time. Below, you see the finished product.

We decided to go for two since I had all the bevelling done for the middle plank on the other side of the boat. We went through the same process as before and had the second one installed in about an hour. There will be a lap of about 1/8" between the garboard plank and the middle plank. I will plane down the edges of the middle plank and fill the valley between the two planks with epoxy with filler in it. There won't be any water getting between those two planks.

Below you see us almost looking like a boat.

Thursday, May 7, 2009

Attaching the First Garboard Plank

I have been putting a bevel on the bottom piece of the pram in my spare time this week, so I convinced John we could attach the first garboard plank in no time last night. So we did. It wasn't exactly no time, but we got the plank positioned and the screw holes drilled in good order. The plank is held to the bottom by screws in the stern transom, the midships frame, the fore keel and the bow transom. All of the rest of the surfaces are held together with epoxy. In order for the epoxy to form a tight bond, we had to put temporary sheetrock screws in the beveled edges at intervals along the edge of the garboard and into the bottom. The holes made by the temporary sheetrock screws will be filled with epoxy once we are done with them. Below you see our beveled edge ready for the plank.


After we had all the screw holes made, we removed the plank and cleaned everything up. I mixed up a batch of epoxy and we spread it on the mating surfaces on both the boat and the plank. We have put masking tape where we don't want epoxy to be. The directions say to put waxed paper on the temporary mould surfaces where you don't want the planks to stick. We used a small nail again to find our screw holes when we put the plank back on the boat and set screws in spots that would hold the plank while we drove the rest of the screws. We used small pieces of shim wood to keep the heads of the sheetrock screws from sinking into the plywood plank. Below you see the plank all screwed down and the clamps holding it to make sure. We had some problems with the holes we drilled in the bow transom and ended up splitting a small piece of the transom off and having to drill another hole. This will have to be repaired with epoxy and filler when we plug the screw holes.


Tonight I spent some time planing off the overlap and sanding it so it is fare with the bottom. It looks pretty nice. I'm ready to do the second garboard on this weekend!


Saturday, May 2, 2009

Fastening on the Bottom

Today we fastened on the bottom of the boat. We spent quite a lot of time getting everything lined up the way we wanted it. In spite of what we thought were careful measurements and leveling and squaring, we still had some things that just were not right. I guess that was where we had to start flying by the seat of our pants.


We began with the bow and midships frame. We clamped the pointie part of the bow where we wanted it and then fit the bottom onto the #3 mould and the midships frame by lining up our center line with each of the frames and clamping it to the midships frame. We reinforced the bow clamp by clamping onto an oak board placed across the bottom piece just aft of the #3 mould and the building jig. This held everything securely enough so that we could drill the holes in the fore keel and the midships frame for the screws.


After drilling the holes, we took the bottom off and cleaned everything up ready for the epoxy. I spread epoxy on both mating surfaces of the bottom and the frame and fore keel. We placed the bottom back on our carefully marked way points and used a small nail to find the screw holes.
The silicon bronze screws are soft and you have to be careful when you screw them in. We buggered some of them trying to use the power drill so most of the screw driving had to be done by hand.


After we had driven all the screws in the fore keel and midships frame, we moved to the stern transom. We brought our two bar clamps and oak board from the bow and placed it across the stern. We clamped the two bar clamps onto the board and the 2 x 4 on the building jig and were able to get the stern of the bottom snug against the stern transom so we could drill the screw holes and countersink them. Then we loosened the clamps so we could epoxy the two mating surfaces. We then tightened the clamps again and tightened the screws. This fastened all the pieces up tight as a teddy bear.


We were both anxious to see how the garboard planks would fit onto the bottom, but we had too many clamps fixed onto the bottom and thought we had better wait until the epoxy set before we removed them and began to fit the garboards.


Saturday, April 25, 2009

Stern and Bow Transoms

Today we installed the stern and bow transoms onto our building jig. We decided to bevel the bow transom and get that ready to install because the fore keel has to be epoxied and screwed to it before it can be screwed to the jig. The very first thing we did was drill a 1/2" hole in the fore keel for the painter to run through once the pram is finished. Next, we beveled the bow transom. Below you see the bevels getting smoothed up.


We drilled our screw holes for the fore keel and the transom, cleaned everything up and I mixed up a batch of epoxy. We spread the epoxy over both surfaces and screwed the fore keel to the transom. Next we made the mistake of spreading epoxy on some of the places that we wanted it to soak into the plywood. For the rest of the afternoon, we were hitting these little places with our fingers, hair or anything else that happened to fetch up on it. Below you see the bow transom with the fore keel attached to it. We also installed the cleats that are used as guides when placing the transoms on the jig.


At this point, we left the bow transom to set and went about setting the angle and fastening our stern transom to the jig. We set our angle, leveled and squared everything up and fastened the transom to the building jig with two sheetrock screws. We also have secured it with the clamps just to make sure it doesn't go anywhere. We used bits of scrap plywood to keep the heads of the screws from sinking into the transom.


Next we went back to our bow transom. This took some jiggering to make all the parts come together as they are supposed to. We finally got it secured to the jig with two sheetrock screws. We'll leave the clamps on it too at least until we get the bottom and perhaps the garboard planks secured to it.


We placed the bottom on top of the whole thing when we were done and began talking about the porcess we would use to secure it to the fore keel, midships frame and the stern transom. The book says to put in "temporary" sheetrock screws in order to hold it in place while you drill the screw holes. We are both reluctant to put any more holes into the bottom than we absolutely have to, so we are back to needing some more rugged clamps than the ones we have. Perhaps we will have to invest in some larger "C" clamps if we can't find any around here.

Sunday, April 19, 2009

Building Frames on the Jig

Yesterday afternoon we installed the building moulds onto our jig. This involved squaring and leveling the moulds and fastening them onto the jig with sheetrock screws. We had to pay close attention to center lines, make sure the moulds were positioned at the correct intervals along the jig and cleat the temporary ones with 1 x 2 pieces of wood. Below you see the finished produce from bow to stern. This involves the notched #3 mould, the laminated midships frame and the #1 mould closest to the stern. This process wasn't rocket science and we found our clamps were helpful to hold things once we got them positioned. In fact, we left the clamps on the moulds after we got the screws in place to add some extra muscle to the frame.


The next process involved bevelling the edges of the stern transom so that the planks would lie flat along the transom once they are fitted. This is where the head work came into play. It took some figuring to get our tools to tell us what we wanted to know and make sure we were cutting to the proper angle before we actually cut the transom. First we established guidelines by which we made our cuts and drew the lines on the outside of the transom. Each plank and the bottom of the pram lie on the transom at a different angle, so this involved setting the saw three times to three different angles and getting our guide tool set at the proper angle as the saw so we could check the results after the cuts. Below you can see the guide lines drawn on the transom.


We made our angled cuts on transom very slowly which would account for the burn marks on the transom, but they all came out well according to the angle tool we had set to check our results. Working with an experienced sawyer doesn't hurt at times like these. Below, you see the transom after the first bevel cut along the bottom. I am sure these edges will need some sanding to make the planks lie flat on them, but we will cross that bridge when we actually do the fitting of the planks.


Sunday, April 12, 2009

The Building Jig

Yesterday, at long last, we built the building jig. This is nothing more than a set of two 8 foot 2 x 4's with 2 x 4 cross pieces at specific locations along the length of them and 1 x 2 cleats at specific locations also.. Sort of like a ladder. Measuring and leveling are critical here because the positioning of the cross pieces and the 1 x 2 cleats determine where the building moulds will be placed and therefore the overall shape of the boat. The end cleats are beveled at specific angles on the edges because the bow and stern transoms will rest against them while the boat is being planked. The stern end of the jig has two uprights also angled to allow the stern to rest against them. We have several things to do before we can put the moulds on the jig. We have to bevel the bow and stern transoms, glue and screw the fore keel to the bow transom, put the positioning cleats on the bow and stern transoms and mark the floor under our sawhorses so if the whole rig moves, we know where the legs were positioned when we did the leveling. We spent a good deal of time stiffening up the sawhorses, squaring the ladder and getting things level before we fastened the jig to the sawhorses. I think we will have to import a set of hands or two to get the moulds affixed to the jig because they also have to be leveled fore and aft, port and starboard. Below is what the whole thing looks like. I am getting anxious to get the moulds onto the jig because then we can really begin making the thing look like a boat.


Friday, April 10, 2009

The Rudder

Last weekend saw no progress on our little boat. We had family and grandkids around so we took the time to enjoy that all too rare experience. We had baseball in the back yard, the swing set got a good workout and we all sat around the table and laughed. What could be better than that? Our younger son will be 35 tomorrow and we celebrated that event a little early.

When I am working on a project, and this pram falls into that category, I make a work schedule in my head. I want to get this much done by thus and such a time. And then if I can't keep up with my own work schedule, I feel that I am falling behind and I need to catch up. I have to admit to feeling that way about the pram this week. I wouldn't change what I did do last weekend for anything but it is what I didn't do that bothers me. So, it was with that feeling during this week that I decided I would work on the pattern for the rudder blade.

The boat plans call for the rudder to be made out of the same sheet of 3/8" plywood that the bottom of the boat is made from. The plans show a grid of 3" squares and the rudder drawn within that grid. John thought I should just draw the grid on the plywood and then draw the rudder directly on the plywood. I was afraid if I did that I would create pencil dents on the plywood and my rudder would forever have a grid on it. So, I took two left over Susan Collins campaign posters (I hope she doesn't mind) and taped them together and drew my grid on them. Then I lined out the shape of the rudder onto the grid. It came out pretty nicely.

Since 3/8" is pretty thin for a rudder, the plans also have you cut out of your left over 1/4" plywood, two cheeks to be glued on either side of the rudder blade to make it a little more rugged where the tiller fastens onto it. I lined out the shape of the cheeks on my grid too. After doing this, I figured the whole thing would be just under an inch wide where the tiller fastens on. Then I began to investigate just how the blade fastens onto the boat. I looked at our favorite marine supply store's website but couldn't find a single "rudder hanging" kit. Then I checked Wooden Boat's website and ah-ha, there was the exact rudder hanging kit I needed. After checking the price of the brass kit, I scrapped my plans for making the rudder out of plywood. This rudder is going to be made out of mahogany! We added a 12" piece of mahogany to John's list of items to order.

Sunday, March 29, 2009

Cutting out Planks

This weekend was spent lining out the planks on the 1/4" marine plywood and cutting them out. I measured out and marked the points showing the shape of each plank. Then we bent a batten around the shape made by the points and drew the lines for each plank. We made sure all the lines were fare...


and then cut them with the jig saw.


We had laid the 1/4 inch plywood over the 3/8 inch plywood used for the bottom so we had a stiffer work surface. We moved the 1/4 inch piece around and clamped it to the 3/8 inch piece in order to create a clear cutting area. This worked pretty well most of the time. One of us held the cut strip while the other sawed. We got three of the planks sawed out yesterday and today we used those for a pattern and traced out the second set of planks.

After completion of the plank cut outs, we cut out the 3/8 inch piece for the bottom.


And here is one of the garboard plank...


We have now completed the construction of all the major pieces for the pram and are ready to construct the building jig. Wow!